Wasabi Personal File Manager Documentation
Welcome
Thank you for purchasing Wasabi Personal File Manager PHP Script. We covered almost everything in this document that how easily you can setup this script. We really do appreciate every sale. If you like our work please do not forget to rate it. It helps us in developing new and better cloud solutions.
Author: Berkine
Demo: Wasabi Personal File Manager Demo
Requirements
Before installation, your server must have following requirements to run the script properly
PHP v7.2 or higherPHP Mbstring ExtensionPHP PDO ExtensionPHP JSON ExtensionPHP CURL ExtensionSupport for MySQL v5.xWasabi Account with Root or Admin Level AccessWasabi IAM User with Bucket Read and Write Access
PHP SDK (Version 3)
Wasabi uses AWS PHP SDK v3 which comes already included with the script, under - "vendor/aws" folder in the root directory of the app. And it is the offical latest AWS PHP SDK without any modification.
AWS PHP SDK v3.171.2 - 2020-12-18
Installation Instructions
This is a general installation overview of the script, there is a deep dive section provided for each part in the left menu bar.
Follow the steps as explained, and you should be all set. If you face any challenges with installtion steps, reach out to us for a support.
Setup overview:
- Step 1: Unzip Wasabi Personal File Manager to the root directory of your hosting - Ex: /var/www/html/. Which will make it reachable as follows: http://yourwebsitename/wasabi
- Step 2: After unzipping files, run install.php file to configure your MySQL Database settings.
- Step 3: (Optional) MySQL Database settings can also be configured manually as explained in notification.php file.
- Step 4: Import the provided database/import_tables.sql database to the same database that you showed under DB Name in previous steps.
- Step 5: (Optional) If step 2 was completed successfully and you were redirected to index.php page, you can delete install.php and notification.php files.
- Step 6: Login into Admin Panel by visiting http://yourwebsitename/wasabi/ page. Use following credentials to login: LOGIN: admin and PASSWORD: 123456. You can change your login and password in Admin Panel as needed.
- Step 7: (Optional) Important: If you want the script to be accessible from any directory or from root directory, change /wasabi/ directory as needed, or remove it if you want to the script accessible directly at: www.yourwebsite.com.
For accessing script under: www.yourwebsite.com/directoryname - replace 'wasabi' in the screenshots below as follows: '/directoryname/admin/'
For accessing script under: www.yourwebsite.com - remove 'wasabi' completely, and it should like following: '/admin/'
1 - Edit: admin/header.php file - Step 8: Include your Wasabi IAM Access Key and Secret Access Key Credentials under Wasabi Configuration page in Admin Panel. If you need to setup Wasabi Account and a bucket, visit Wasabi Setup page. Make sure you include your Bucket name as well and select correct Wasabi Region.
- Step 9: Run synchronize_wasabi_account.php file to synchronize your existing buckets and files in your wasabi account.
- Step 10: For seting up SMTP configurations, follow the instructions under PHPMailer Setup page.
- Step 11: Now you should be all set, enjoy the script!.
- Step 12: Important: If your wasabi buckets get input files outside of this script, you can create cron job with admin/includes/cron.inc.php on a regular basis (recommeded to run less frequently). Depending on file size, it might take around few minutes to complete the synchronization process because of getObjectACL() command, which natively takes couple seconds per object.

2 - Edit: admin/core/init.core.php file

File Structure
General overview of included files:
- Assets - All Client/server CSS and JS files
- Classes - Entire script was written with OOP approach, all used classes are stored here
- Core - Core settings and single file for all included files
- Includes - Helper files for pages to call proper methods and run CRUD for DB
- Pages - All Admin Panel pages are stored here
|   index.php
|   install.php
|   notification.php
|   README.txt
|   synchronize_wasabi_account.php
|
+---admin
|   |   footer.php
|   |   header.php
|   |   login.php
|   |   logout.php
|   |   navbar.php
|   |
|   +---assets
|   |   +---css
|   |   |       32px.png
|   |   |       40px.png
|   |   |       all.min.css
|   |   |       animate.min.css
|   |   |       awselect.min.css
|   |   |       bootstrap.css
|   |   |       bootstrap.css.map
|   |   |       Chart.css
|   |   |       Chart.min.css
|   |   |       datatables.min.css
|   |   |       filepond.css
|   |   |       jstree.min.css
|   |   |       photoviewer.min.css
|   |   |       plyr.css
|   |   |       responsive-styles.css
|   |   |       styles.css
|   |   |       throbber.gif
|   |   |
|   |   +---img
|   |   |       login-bg.jpg
|   |   |       preload.gif
|   |   |
|   |   +---js
|   |   |       awselect.min.js
|   |   |       bootstrap.bundle.js
|   |   |       bootstrap.bundle.js.map
|   |   |       Chart.bundle.min.js
|   |   |       Chart.min.js
|   |   |       custom-w.js
|   |   |       custom.js
|   |   |       datatables.min.js
|   |   |       filepond-plugin-file-validate-size.min.js
|   |   |       filepond-plugin-file-validate-type.min.js
|   |   |       filepond.jquery.js
|   |   |       filepond.min.js
|   |   |       jquery-3.5.1.min.js
|   |   |       jquery-3.5.1.min.map
|   |   |       jstree.min.js
|   |   |       jstree.sort.js
|   |   |       modernizr.js
|   |   |       moment.min.js
|   |   |       photoviewer.min.js
|   |   |       plyr.min.js
|   |   |       plyr.min.js.map
|   |   |
|   |   +---webfonts
|   |
|   +---classes
|   |       Config.class.php
|   |       Cookie.class.php
|   |       DB.class.php
|   |       Email.class.php
|   |       Hash.class.php
|   |       Input.class.php
|   |       Redirect.class.php
|   |       Session.class.php
|   |       Token.class.php
|   |       User.class.php
|   |       Validate.class.php
|   |       Wasabi.class.php
|   |
|   +---core
|   |       init.core.php
|   |
|   +---includes
|   |   |   bucketactions.inc.php
|   |   |   bucketinfoprocess.inc.php
|   |   |   bucketsizeprocess.inc.php
|   |   |   changepassword.inc.php
|   |   |   changeuploadsettings.inc.php
|   |   |   changewasabicredentials.inc.php
|   |   |   countuploadedfiles.inc.php
|   |   |   countuploadedtraffic.inc.php
|   |   |   folderprocess.inc.php
|   |   |   multipartupload.inc.php
|   |   |   sanitize.inc.php
|   |   |   smtpsettings.inc.php
|   |   |   smtptest.inc.php
|   |   |   tableactions.inc.php
|   |   |   tablefilesprocess.inc.php
|   |   |   tablesharesprocess.inc.php
|   |   |   tabletodayprocess.inc.php
|   |   |   totalupload.inc.php
|   |   |   updateprofile.inc.php
|   |   |
|   |   \---errors
|   |           404.php
|   |
|   +---pages
|   |   +---analytics
|   |   |       wasabianalytics.page.php
|   |   |
|   |   +---data
|   |   |       buckets.page.php
|   |   |       shares.page.php
|   |   |
|   |   \---settings
|   |           password.page.php
|   |           profile.page.php
|   |           smtp.page.php
|   |           upload.page.php
|   |           wasabicredentials.page.php
|   |
|   \---vendor
|       +---aws
|       +---PHPMailer
|
+---documentation
Database Setup in phpMyAdmin
To run admin panel properly and fetch the application usage data and to set the settings you will need to setup local MySQL database.
All the necessary tables are provided in the root directory of the application, under database folder in a file called database.sql. You will need to import it into your existing or new database.
How to Import Database in phpMyAdmin:
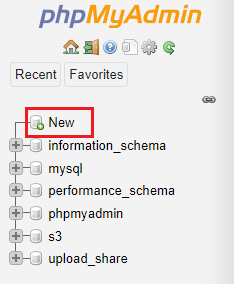
- Step 1: Login into phpMyAdmin.
- Step 2: Click on New button to create a new database.
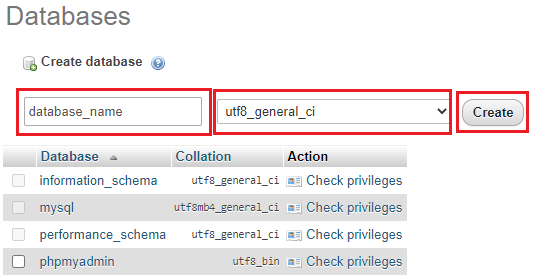
- Step 3: Provide database name and select utf8_general_ci as collation and click create button.
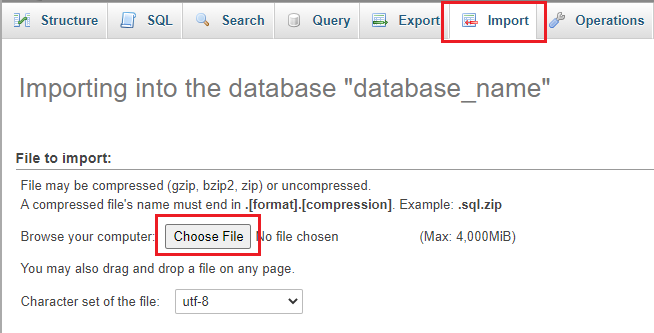
- Step 4: After the new database is created, select Import tab and select database.sql file that comes with the application in database folder, and click on Go button.
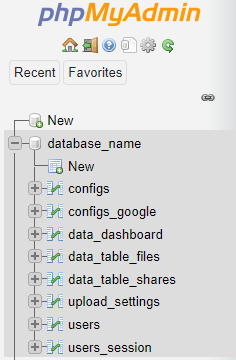
- Step 4: Tables in your newly created database should look like this.
After you have your Database Environment setup, run install.php file:
It will create a new file called dbconfig.core.php under admin/core folder..
- In install.php file:
- Set mysql db host address.
- Set mysql db username.
- Set mysql db password.
- Set mysql database name.
Wasabi Account Creation
Getting started with Wasabi. If you already have Wasabi Account, skip to next section.
How to Create Wasabi Account:
- Step 1: Open the Wasabi home page.
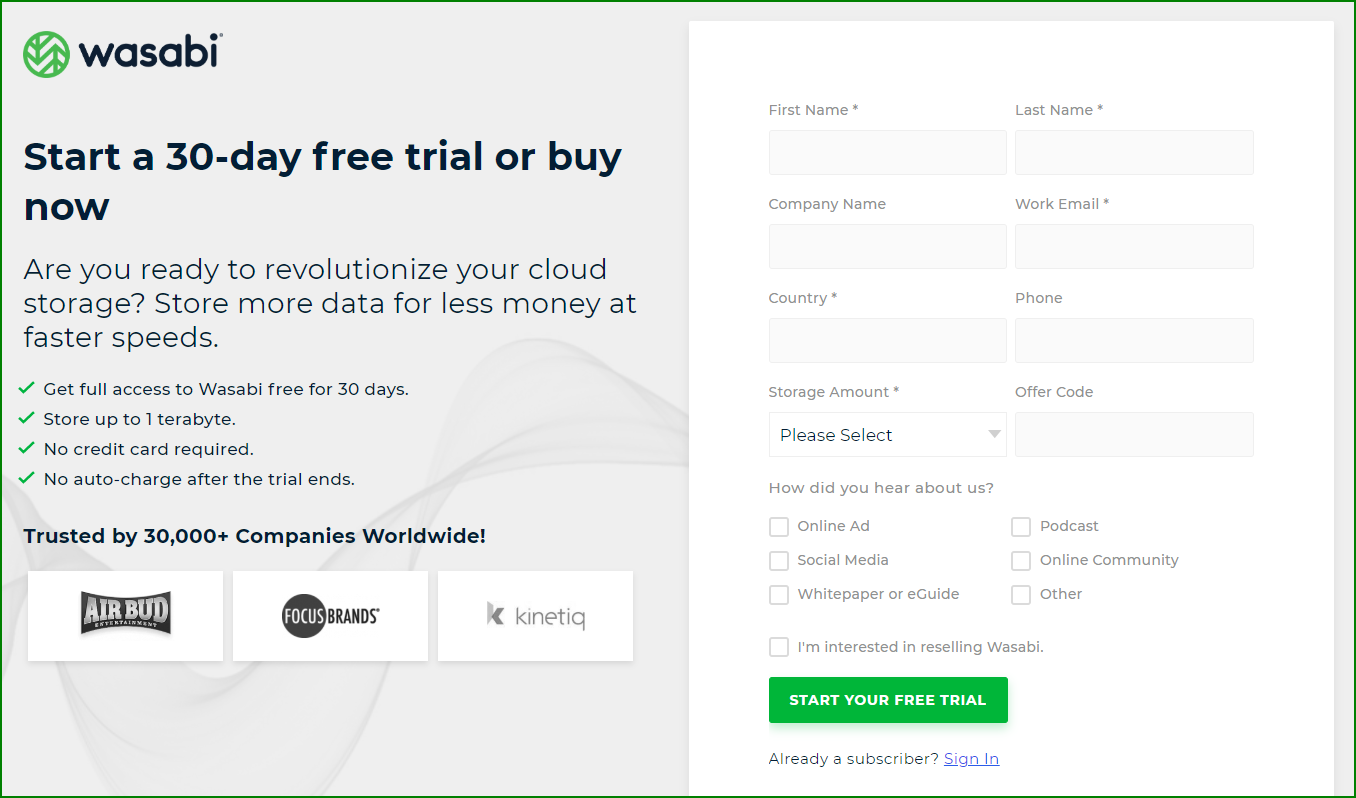
- Step 2: Choose the TRY or BUY Now button.
- Step 3: Enter your account information, and then choose Continue. Be sure that you enter your account information correctly, especially your email address. If you enter your email address incorrectly, you can't access your account.
- Step 4: Enter your first and last names. And, enter your email address at which you will receive a free trial invitation.
- Step 5: Enter your country.
- Step 6: Select the amount of storage that you would require.
- Step 7: Optionally, enter an offer code.
- Step 8: Click START YOUR FREE TRIAL. Wasabi will email an invitation as your link to Wasabi. You can use your free trial to store up to 1 TB of storage for 30 days, without the requirement of a credit card.
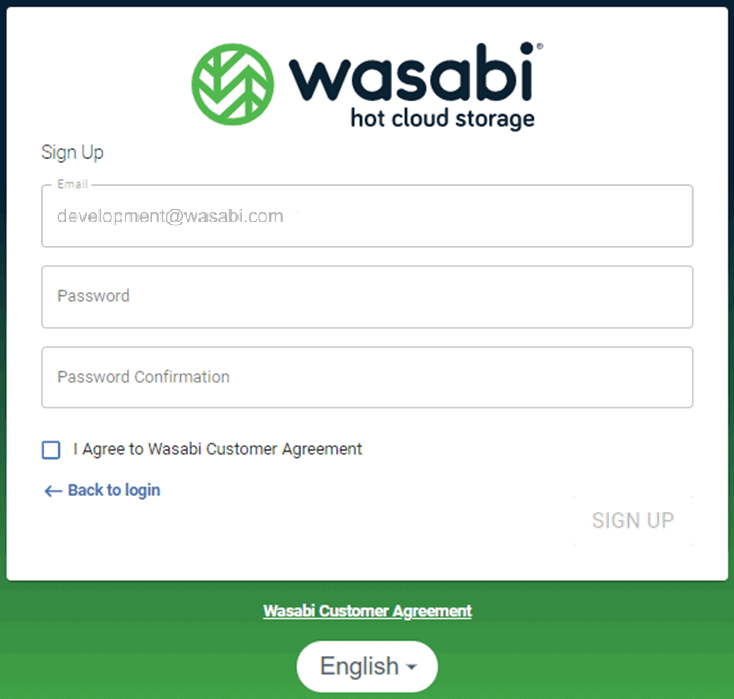
- Step 9: In your email (“You are invited to try Wasabi”), click Create Account to create your free trial account.
- Step 10: Click to check that you have read and agree to the Wasabi Customer Agreement. A link to the Agreement is available below the Sign Up panel.
- Step 11: Click SIGN UP.
- Step 12: You are now ready to work with the Wasabi Management Console and add a bucket.
- Step 13: IMPORTANT: Wasabi does not allow file donwloads via API if you are in trial mode
Wasabi New Access Key
You will need Access Keys to programmatically access your bucket.
Creating Access Key:
- Step 1: Sign in to the Wasabi Console and select Accessk Keys on the left column.
- Step 2: Click on Create New Access Key button on the top right corner and click Create for Root User.
- Step 3: Download your access keys and store in secure place.
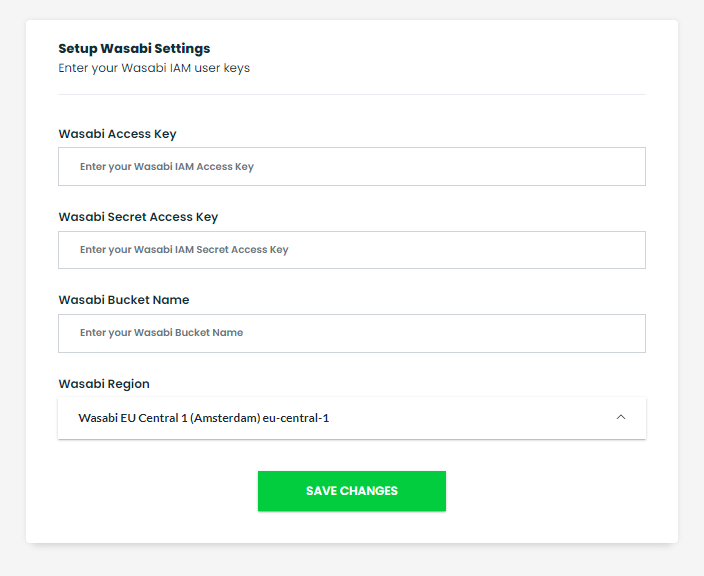
- Step 4: Include your Access Key and Secret Access Keys in the Admin Panel under Wasabi Credentials.
- Step 5: Make sure you include Bucket Name and select Wasabi Region accurately.
Wasabi Bucket Creation
You will need a Bucket with public read & write access in the region that you prefer.
A bucket is owned by the Wasabi account that created it. By default, you can create up to 100 buckets in each of your Wasabi accounts. If you need additional buckets, you can increase your account bucket limit to a maximum of 1,000 buckets by submitting a service limit increase. For information about how to increase your bucket limit, reach out to Wasabi Support Team.
Create a bucket:
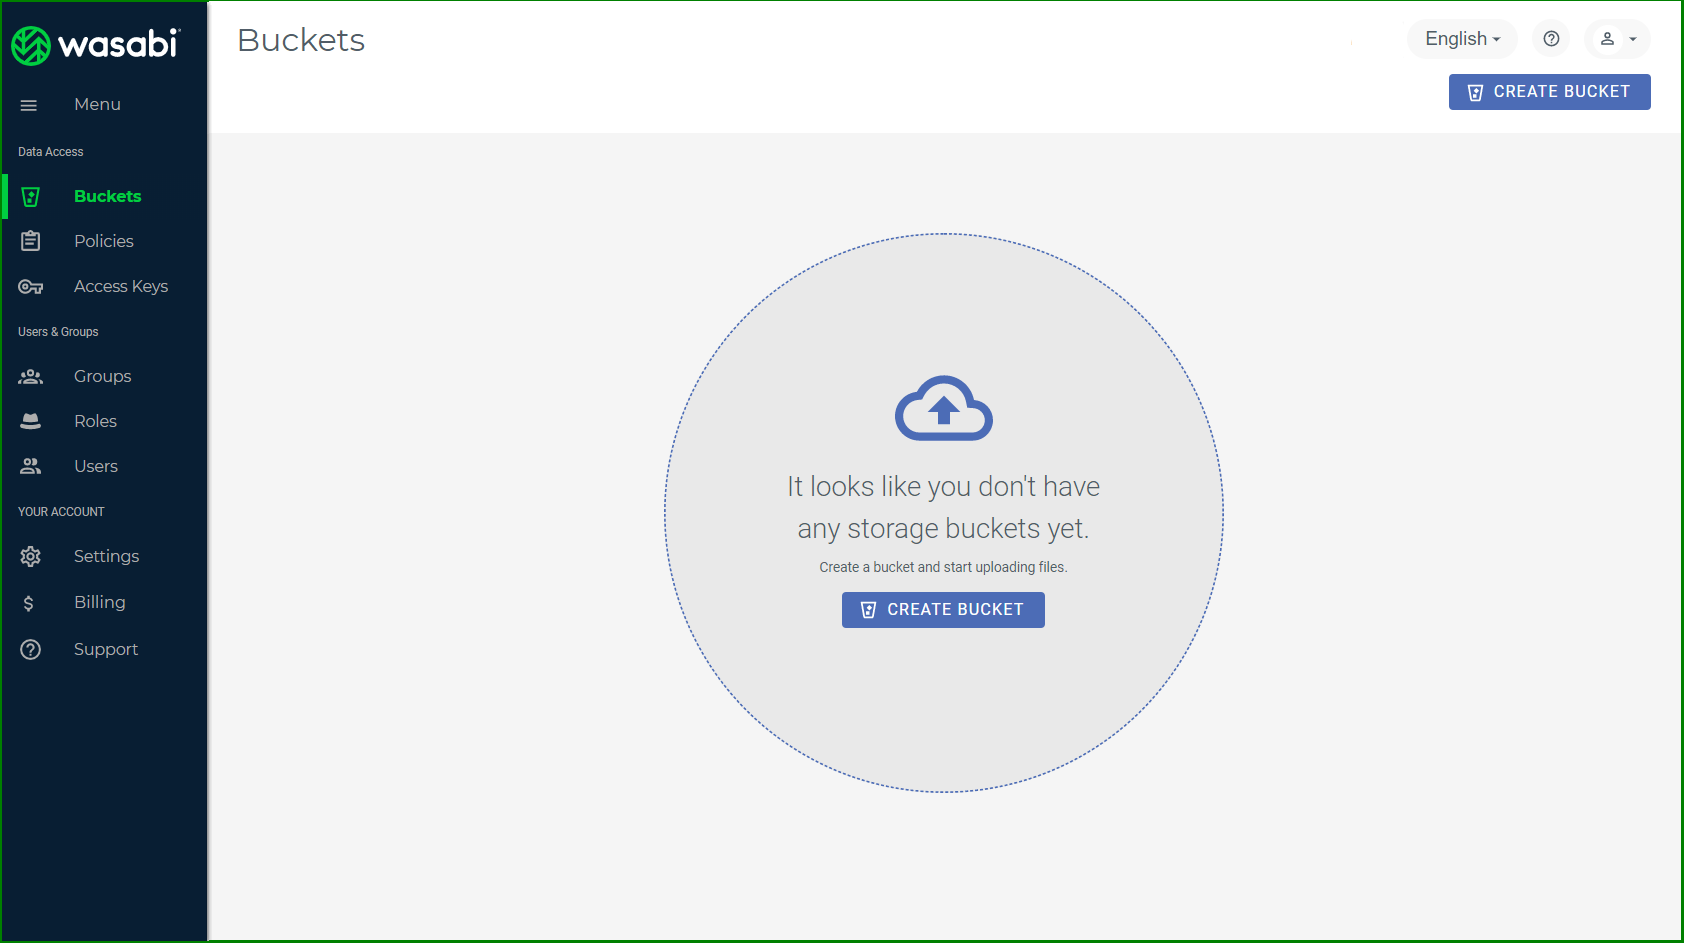
- Step 1: On the Wasabi menu, click Buckets and then click the CREATE BUCKET button.
- Step 2: If you are a new user, you may see a screen such as the one below. You can click either blue CREATE BUCKET button.
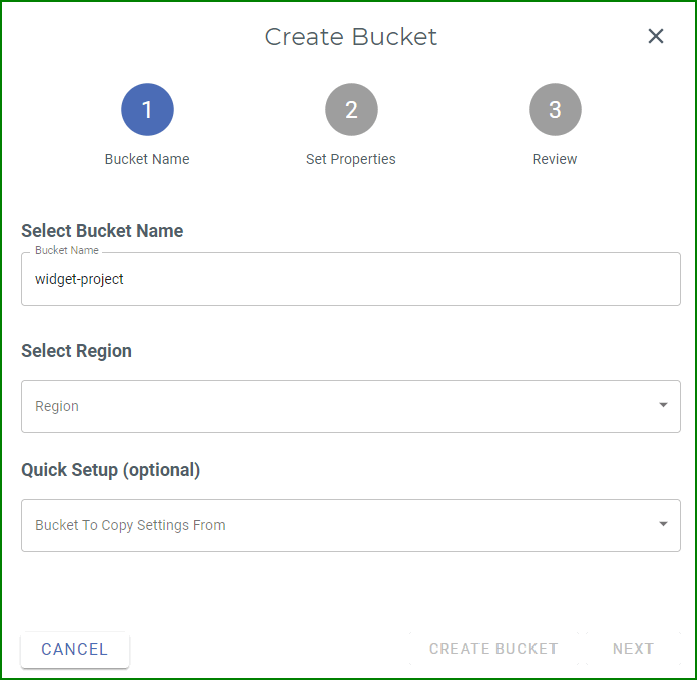
- Step 3: In the “Select Bucket Name” area, enter a unique DNS-compliant name for your new bucket. A bucket name can consist of 3 to 63 lowercase letters, numbers, periods, and dashes. The name must begin with a lowercase letter or number. The name cannot contain underscores, end with a dash, have consecutive periods, or use dashes adjacent to periods. And, the name cannot be formatted as an IP address (123.45.678.90).
- Step 4: Select the region (geographic location) where you want the bucket to reside.
- Step 5: If you have an existing bucket, a “Quick Setup” area is included on the Create Bucket panel. Optionally, you can copy the settings from an existing bucket. To do so, click in the “Quick Setup” area. A list of existing buckets is displayed
- Step 6: Click CREATE BUCKET to create the new bucket and end this procedure.
- Step 7: You can configure optional features are versioning, etc as needed. The new bucket is displayed on the Object Storage panel.
PHPMailer Configuration
For sending donwload links via email the latest version of PHPMailer is used, included under vendor folder in root directory.
All the SMTP settings can be configured and set in Admin Panel under SMTP Settings.
Required SMTP Settings:
- SMTP Host
- SMTP Port
- SMTP Encryption
- SMTP EMail Login
- SMTP EMail Password
You can also add optional SMTP Settings:
- From Email Address
- From Name
- Default Email CC
Include Required SMTP Settings and click Save Changes button:

You can also test your SMTP Settings immediately via Test Email Settings:

If you are planning to use Gmail for sending emails:
In your Gmail Account settings, under Security tab, make sure your Less secure app access feature is turned on.


Upload Configuration
Although Wasabi can potentially store unlimited number of files, your browser's parallel upload capability might be limited. The main limitation could be exceeding your stack with multipart chunk uploads.
Wasabi Multipart Upload Restrictions:
- Maximum uploaded object size can be: 5TB
- Maximum number of parts(file chunks) per upload: 10000. Important: It is strongly recommended to use bigger chunks for large files to avoid stack
- Part size must be between 5MB and 5GB. There is no size limit on the last part of your multipart upload.
- Maximum private signed link duration is: 7 Days
Default Chunk Size Change:
All file uploads are done via Direct Multipart Feature, you can custom file upload chunk size under admin / settings / File Share settings page.
CRON Job Configuration
In case if your buckets frequently get updated from other sources, you will need to synchronize your wasabi buckets with local database by creating a cron job.
How to create simple CRON job:
- Step 1: Open terminal in your hosting platform.
- Step 2: Run crontab -e command
crontab -e
0 0 * * * curl https://yourwebsite/wasabi/admin/includes/cron.inc.php > /dev/null
crontab -l
Initial Release v1.0.0
Released on 28th December, 2020